Aloa happy painters,
this article can be seen as an addition to the big blood and splatter tutorial we have in our library:


Pure gore in here, always keep in mind that less is more.
This article will show you how you can easily add some more tiny detail to your gore work. The technique explained here might not be something new to some of you, but for those who don't know it yet it might come handy. First, let me tell you what you need to use this technique:
One hair ... if you got none, steal it ninja-like:

Don't lose it or you got to put your ninja skills again to test. You will also need the colour Tamyia clear Red, a hobby knife, superglue plus an old brush. Not to forget a figure which is close to finish where you want to add the following technique. Take that hair on a place where you can see it well.

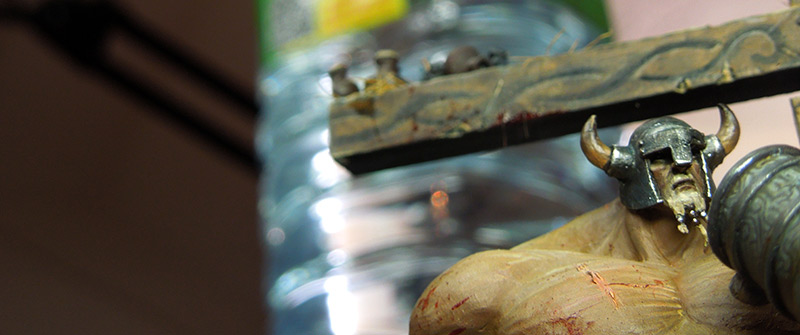
Choose the spot on your figure/base where you want to place the dripping blood. In my case you can imagine the scene after a massive bar brawl, blood splatters everywhere, fresh and still wet ... I want some blood drops here:


Now I use my superglue to add the hair pieces to the spots I want some blood dropping from, for example at his weapon hand too. I am using a toothpick to put a small dot of superglue at the area, use the toothpick again for picking up the small hair pieces and use the toothpick again to place them as I want to:

Done that on the wood piece too ... ups, unsharp photo:


I hope you enjoyed reading my thoughts, always remember don't overdo your gore effects as it often can look unfitting to a figure. It depends on your scene, on your story you tell, on the figure and on your personal taste.
Keep on happy painting!
Best Wishes
Roman
without Raffa you are lost :-)
ReplyDeletemy hair lees brother
regards
Achim
Haha, you definitely needed Raffa for this technique :D
ReplyDeleteNice tutorial, I will try it out for sure! Thank you!
Scary...
ReplyDeleteThank you for the tutorial, i'll try this soon, for the first time.
ReplyDeletehow to make scuh dirty hands of blood and natural placing of the blood on body ?
ReplyDeleteI love how you painted the blood in general! Not just the drops (which are awesome too!) but the natural placement of the blood on the hand and the realistic effect on the ax! Pls do share your amazing secrets!
ReplyDeleteThere is not really a secret behind it. I always try to think what the guy with the weapon has done. How he chopped and swinged that beast of an axe ... then I try to imagine what happened when he did really hurt someone with those axe swings. Now try to imagine how the axe enters the body of his foe, now try to imagine how the blood shots out from there ... that is kind of cruel imagination but to do it realistic you have to make your thoughs about realism ... hope this helps. There is no other secret behind miniature painting than nature :)
ReplyDeleteAlright i tried it out and this is the result!
ReplyDeletehttp://tinyurl.com/lu2uhyf
Wow nice job Koen
ReplyDelete