


posted by Roman, Jarhead, kong

Introduction
This article has to be seen as an introduction in the use of the Airbrush. It will not bring you the perfect way on how you can handle your airbrush - it will just show you the way i have gone while i doing a little unit of Tau Firewarrior for the use on the gaming table. I will try to bring everything important for an easy start with your airbrush into this article. To get my whole message please try to read concentrated and all of this blabubb. Seriously, we start now ...
Getting Started
I am waiting to start with some bigger projects these days. During these waiting time I decided to do something unusal. A fast unit of Tau Firewarriors for the gaming table. I came upon the idea as i stumbled over the cool gaming bases from Secret Weapon that i really like. The ones i have in use here are titled as Beveled Edge: 25 mm "Ruined Temple Bases".


I really like those as they are cool and simple. If i would play an army i would bring them up here i guess, great resin quality and damn nice i think. As you can see i already started gluing the Tau in place. I really wanted to be fast with this unit to keep them simple and for the gaming table - in fact i just tried to avoid the loss of motivation :D
After the Tau have been glued and prepared for painting action i primed them white as i knew i would go at them with the Airbrush first. White Primer brings out my colours up there more stronger. I won't name any brands or other technical information of the "perfect" Airbrush here meanwhile as this is more an own topic like a "What to buy recommandation". There are several good guides outthere which bring you closer to the understanding of an airbrush, like
How to Airbrush
Best Airbrush Gun?
How to Airbrush - Airbrush Paint Quick Review
What Airbrush is the best?
Information about Airbrush Compressors
- Make sure you handle your airbrush with care (honestly i am not the best in this part)
- Clean it after every step of work (i try)
- Clean it even better when finished with todays work and if you know that you won't use it for the next days (i do and sometimes hate myself for forgetting it)*
*There will be another article about big airbrush cleaning time on what i got to do when forgetting the in between clean ups - for the upcoming growing airbrush article section, soon ... maybe :)
- I mostly work with Citadel Acrylic colours and thin them with casual water.
- I also use some Vallejo Model Acrylic colours and thinned them with water.
- I too use Vallejo Model Air colours, they mostly do not need to be thinned as they are done for the use of airbrush, also good for casual painting and glazing
- Raffa says that the use of Tamyia Airbrush thinner instead of water is great , but i got none yet
IMPORTANT:
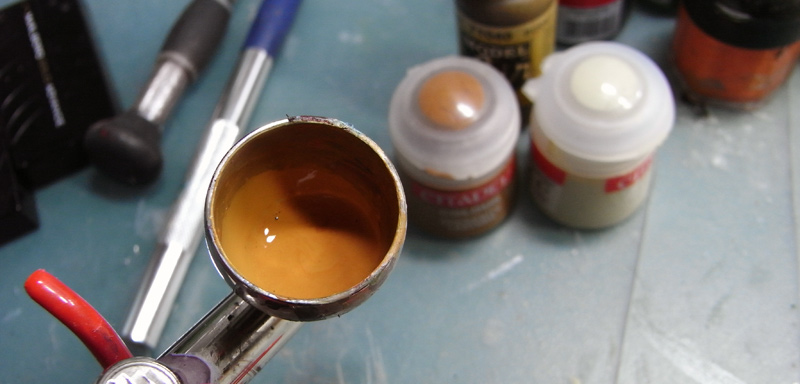
When your Airbrush is ready to be filled up, make sure you bring in the water first and then use a brush or a stick to mix in your colour. If you do it the other way the colour is way too thick and will cram your airbrush before you ever started to fire it up. Water first, colour next. I always do this with the use of a pipette. Make sure you use clean and fresh water, no old painting water because you are too lazy to get some new water.
There are many more details about handling your airbrush while working - soon there is planned to reveal more information around that topic in a single article. Please be patient about that basic handling write up.
So i have started the Taus on white Primer with a basic layer of Bleached Bone + Snakebite Leather. In this case i am only planning to airbrush the armour parts and bases, paint all other things later on with the brush and my hand. I thin the colour in the airbrush as i told you. I always try to do around 65% ~ 70% colour and 30% water. If you are too thin with your colour you will see your gun spit or the layer not opaque on the surface you are working on. I always go with the rule for myself that 2 layers of basic colour should be 100% opaque to work further. Wait in between these 2 layers until the first is dry.


You now can see the opaque basic colour up to a white primer. I did choose the colour pretty bright as I plan only to use the airbrush now for shadows. Looking at the zenithal lightning situation helps me with the areas i want to make darker. I used the basic colour and put in a little drop of Vallejo's Air Burnt Umber 71040 to make the basic colour a bit darker. I use this mix for the first shadows i shot with my airbrush gun. I try to grab the big wooden block you can see on the photos to hold these several miniatures at once. This makes them movable and i can get the right ankle from where i want to bring shadows into the models. It is not unusual to move the wood piece for several times to really be sure you checked all the lower parts of the models for shadows. make sure not to forget something.
Holding several models at once


Article showing you a guide on how to easily handle more than one miniature.
After everything was dry Iagain mixed in another additional drop of the the Burnt Umber to make one final spray run for the final shadows.


The bases did get 2 basic colour layers of Panzer Aces USMC Highlight Tank Crew 323. After the models are already glued to the base you have to get close enough to not damage your first run on the armour. Sure i did hit the models on the lower parts but that is not a problem at the moment. I was careful. If you want to avoid such happy accidents paint the models and bases in single.
Please keep in mind that these guys up there will be gaming miniatures. With this in the back of my mind i went over to brushwork. I did not spray light again as this will make your models somehow look grey in the end. I will work with the lights i have left from my basic colour and maybe add some more with the brush.
For the next steps i used some Chaos Black with a drop of Scorched Brown to paint the clothing parts with the brush. Also i have painted blue areas with a mix of Hawk Tourquise and Skull White.

The next step was a little highlight in the clothing parts and other black parts, added with a drop of Codex Grey to the basic colour. I have used VanDyck Brown Oil colour to gentle rub it on the bright bases. Oil Colour Information Link!
I also used a glaze of pure Snakebite Leather to rework the armour areas that have been hit by the base colour. Pretty simple just Snakebite Leather.


For the final steps i have used some pure Hawk Tourquise and a brush with a good tip to paint the battle painting those Taus wear. Nothing fency - just for the gaming table. I did put a drop of white into the lenses of the facemasks and put some dayglow pigments on it after it was dry. Some final edge lights on the armour have been done with pure Bleached Bone, mostly in the upper areas. I carefully washed the armour parts with Ogryn Flesh from Citadel. Mostly in the lower parts to get some depth in the armours disruptions. I also put some effort in the skin of the group leader. Did use some Hawk Tourquise for the first shadows and then miced it with a drop of Ogryn Flesh to get the deepest areas (for example the eye sockets). After this i went back to the skin basic of Hawk Tourquise and Skull White and worked out some light spots on the face. The bases have been drybrushed with pigment powder like described here in this pigment powder on bases article.


The Upper photos are not yet the complete end. I will do some more work on them, not much - but i will do them for a german painting competition where you are not allowed to show final photos yet. For a quick gaming paintjob i would leave them that way as i am happy on what i managed to do in about 5 hours of work from the start of the painting. It was a real joy to paint a little unit again, even i shoudl have done 12 models for a regular Tau unit. As soon as the painting competition is over i will let you know what i have done further and show you the final photos.
Hope you liked this little "preparation" of the new airbrush section and had some fun in reading it.
Keep on happy painting!
Best Wishes
Roman

Introduction
This article has to be seen as an introduction in the use of the Airbrush. It will not bring you the perfect way on how you can handle your airbrush - it will just show you the way i have gone while i doing a little unit of Tau Firewarrior for the use on the gaming table. I will try to bring everything important for an easy start with your airbrush into this article. To get my whole message please try to read concentrated and all of this blabubb. Seriously, we start now ...
Getting Started
I am waiting to start with some bigger projects these days. During these waiting time I decided to do something unusal. A fast unit of Tau Firewarriors for the gaming table. I came upon the idea as i stumbled over the cool gaming bases from Secret Weapon that i really like. The ones i have in use here are titled as Beveled Edge: 25 mm "Ruined Temple Bases".


I really like those as they are cool and simple. If i would play an army i would bring them up here i guess, great resin quality and damn nice i think. As you can see i already started gluing the Tau in place. I really wanted to be fast with this unit to keep them simple and for the gaming table - in fact i just tried to avoid the loss of motivation :D
After the Tau have been glued and prepared for painting action i primed them white as i knew i would go at them with the Airbrush first. White Primer brings out my colours up there more stronger. I won't name any brands or other technical information of the "perfect" Airbrush here meanwhile as this is more an own topic like a "What to buy recommandation". There are several good guides outthere which bring you closer to the understanding of an airbrush, like
How to Airbrush
Best Airbrush Gun?
How to Airbrush - Airbrush Paint Quick Review
What Airbrush is the best?
Information about Airbrush Compressors
I can only tell you those hints and things I know myself. For sure there millions of tips and hints and ideas and thoughts and experiences about that topic and i feel myself a pure rookie on it, honestly, but i have my fun. So just my thoughts, nothing more. If you want to add something i did forget, did not know or did not mention please feel free to do so in the comments. This article really only shows the basic use of the airbrush on gaming miniatures with my own experiences.
When using the Airbrush there are several things pretty important:
- Make sure you handle your airbrush with care (honestly i am not the best in this part)
- Clean it after every step of work (i try)
- Clean it even better when finished with todays work and if you know that you won't use it for the next days (i do and sometimes hate myself for forgetting it)*
*There will be another article about big airbrush cleaning time on what i got to do when forgetting the in between clean ups - for the upcoming growing airbrush article section, soon ... maybe :)
- I mostly work with Citadel Acrylic colours and thin them with casual water.
- I also use some Vallejo Model Acrylic colours and thinned them with water.
- I too use Vallejo Model Air colours, they mostly do not need to be thinned as they are done for the use of airbrush, also good for casual painting and glazing
- Raffa says that the use of Tamyia Airbrush thinner instead of water is great , but i got none yet
IMPORTANT:
When your Airbrush is ready to be filled up, make sure you bring in the water first and then use a brush or a stick to mix in your colour. If you do it the other way the colour is way too thick and will cram your airbrush before you ever started to fire it up. Water first, colour next. I always do this with the use of a pipette. Make sure you use clean and fresh water, no old painting water because you are too lazy to get some new water.
There are many more details about handling your airbrush while working - soon there is planned to reveal more information around that topic in a single article. Please be patient about that basic handling write up.
So i have started the Taus on white Primer with a basic layer of Bleached Bone + Snakebite Leather. In this case i am only planning to airbrush the armour parts and bases, paint all other things later on with the brush and my hand. I thin the colour in the airbrush as i told you. I always try to do around 65% ~ 70% colour and 30% water. If you are too thin with your colour you will see your gun spit or the layer not opaque on the surface you are working on. I always go with the rule for myself that 2 layers of basic colour should be 100% opaque to work further. Wait in between these 2 layers until the first is dry.
First one:

Second One, still wet:

When something is wet and i want it dry fast i use my hairblower:

You now can see the opaque basic colour up to a white primer. I did choose the colour pretty bright as I plan only to use the airbrush now for shadows. Looking at the zenithal lightning situation helps me with the areas i want to make darker. I used the basic colour and put in a little drop of Vallejo's Air Burnt Umber 71040 to make the basic colour a bit darker. I use this mix for the first shadows i shot with my airbrush gun. I try to grab the big wooden block you can see on the photos to hold these several miniatures at once. This makes them movable and i can get the right ankle from where i want to bring shadows into the models. It is not unusual to move the wood piece for several times to really be sure you checked all the lower parts of the models for shadows. make sure not to forget something.
Holding several models at once
Article showing you a guide on how to easily handle more than one miniature.
After everything was dry Iagain mixed in another additional drop of the the Burnt Umber to make one final spray run for the final shadows.

+

=

@
ppftt! ppffttt!!

The bases did get 2 basic colour layers of Panzer Aces USMC Highlight Tank Crew 323. After the models are already glued to the base you have to get close enough to not damage your first run on the armour. Sure i did hit the models on the lower parts but that is not a problem at the moment. I was careful. If you want to avoid such happy accidents paint the models and bases in single.
Please keep in mind that these guys up there will be gaming miniatures. With this in the back of my mind i went over to brushwork. I did not spray light again as this will make your models somehow look grey in the end. I will work with the lights i have left from my basic colour and maybe add some more with the brush.
For the next steps i used some Chaos Black with a drop of Scorched Brown to paint the clothing parts with the brush. Also i have painted blue areas with a mix of Hawk Tourquise and Skull White.

The next step was a little highlight in the clothing parts and other black parts, added with a drop of Codex Grey to the basic colour. I have used VanDyck Brown Oil colour to gentle rub it on the bright bases. Oil Colour Information Link!
I also used a glaze of pure Snakebite Leather to rework the armour areas that have been hit by the base colour. Pretty simple just Snakebite Leather.


For the final steps i have used some pure Hawk Tourquise and a brush with a good tip to paint the battle painting those Taus wear. Nothing fency - just for the gaming table. I did put a drop of white into the lenses of the facemasks and put some dayglow pigments on it after it was dry. Some final edge lights on the armour have been done with pure Bleached Bone, mostly in the upper areas. I carefully washed the armour parts with Ogryn Flesh from Citadel. Mostly in the lower parts to get some depth in the armours disruptions. I also put some effort in the skin of the group leader. Did use some Hawk Tourquise for the first shadows and then miced it with a drop of Ogryn Flesh to get the deepest areas (for example the eye sockets). After this i went back to the skin basic of Hawk Tourquise and Skull White and worked out some light spots on the face. The bases have been drybrushed with pigment powder like described here in this pigment powder on bases article.


The Upper photos are not yet the complete end. I will do some more work on them, not much - but i will do them for a german painting competition where you are not allowed to show final photos yet. For a quick gaming paintjob i would leave them that way as i am happy on what i managed to do in about 5 hours of work from the start of the painting. It was a real joy to paint a little unit again, even i shoudl have done 12 models for a regular Tau unit. As soon as the painting competition is over i will let you know what i have done further and show you the final photos.
Hope you liked this little "preparation" of the new airbrush section and had some fun in reading it.
If this article helped you and you want to say thanks in any form, feel welcome to drop your thoughts in the comments or hit the the donation button
Keep on happy painting!
Best Wishes
Roman


Very timely. I just bought my self an airbrush, but I think I will get started with large vehicle models before I attempt to do any infantry. I love how you've incorporated turquoise in little areas to really liven up the models.
Tau is my favorite army for 40k but unfortunately their models are showing their age compared to what GW can produce in plastic these days.
Thanks for the tutorial. Can you please explain a little more how you applied the shadows? Were you spraying from below (like reverse zenitahl highlight) or just went by experience where to put them?
The models look great - and thanks for using some of my bases on them!
something Ive found usefull for keeping my airbrush clean, fill an old soap bottle (dishwashing) with water.
It's easy to wash your airbrush clean in between colors when You've got clean water closeby.
And those bottle don't spill either :D
Generally usefull for diluting paints too, if you're carefull, you can measure out in regular drops :P
An alternative to using a compressor for airbrushing is a CO2 tank bought from a welding supply company. Here is an article about it:
http://www.ipms-seattle.org/tips/co2.htm
Totally silent, and no moisture trap needed. You do need a regulator, since running 800PSI through the brush is probably not a good plan! Cost is about the same as a cheap compressor, but significantly less than the cost of a silent compressor.
Incredible article, I always add Paint first then water, just that made super valuable the article, as soon as I g9ot home I will try it.
I use some water mixed with glass cleaner (for windows) to dilute my paint.
Works pretty nice, and can be used also to clean the airbrush
very good tuto, nicely explained as usual
thanks
Francois
Hiho @all and thanks for the great response on the article.
"Can you please explain a little more how you applied the shadows? Were you spraying from below (like reverse zenitahl highlight) or just went by experience where to put them?"
I did concentrate to hit them from the low, you can name it reverse zenithal lightning apply or better zenithal shadow apply :)
Many thanks for all your own experiences shared here - these comments will make the article only better, muchas gracias!
hello :)
thank you for the excellent tutorial, those tau look fantastic!
just a quick question however: will it work with a airbrush that has a little bottle for the paint on the underside?
thank you
-fuzz
Thank you for mentioning my article. I'm still collecting some data and have already created some kind of statistics shown like a graphic chart pie on the topic "the best airbrush" or I'd call it "people choice".
Thank you for sharing this interesting and informative article, painting with airless spray gun will be faster and more interesting!
regards,
Elcometer 311