


posted by roman, jarhead, kong

Hiho Jungle friends,
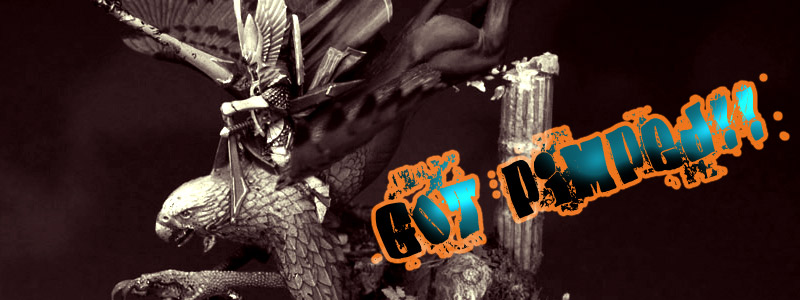
this time I am able to bring you another weird article and I allow myself to call it a step by step, BUT it is not in fact. It is the second "He got pimped!" article you now can find in the article section. I once pimped a gladiator bust and you can find the related article here.
Pimping for me means...
... sometimes when I finish a model I am happy to finish it and am proud when it is done. I already sold the "Prince of autumn" but shipping the model the postal way is a no go at this figure and I am in good contact with the new owner. We planned to exchange the figure at this years german Games Day but both we failed but it ain't that bad :D
I promised the new owner to do some more things on the griffon as by time - as he comes to age - I see areas I wanted to do different. That is why sometimes I pimp stuff. Sometimes there is just something rolling in the deep.
Now to the point why this article might get confusing. The early photos are not the best from their quality and it is even hard for me to tell the difference, but I will try to explain and I hope my words are of any interest for some of you.

Now straight from my heart ...
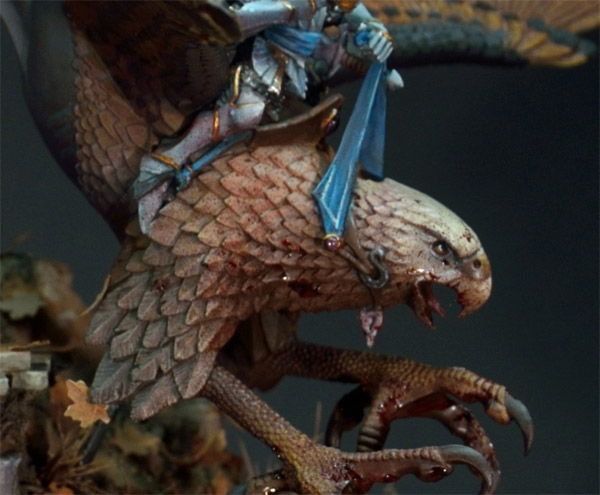
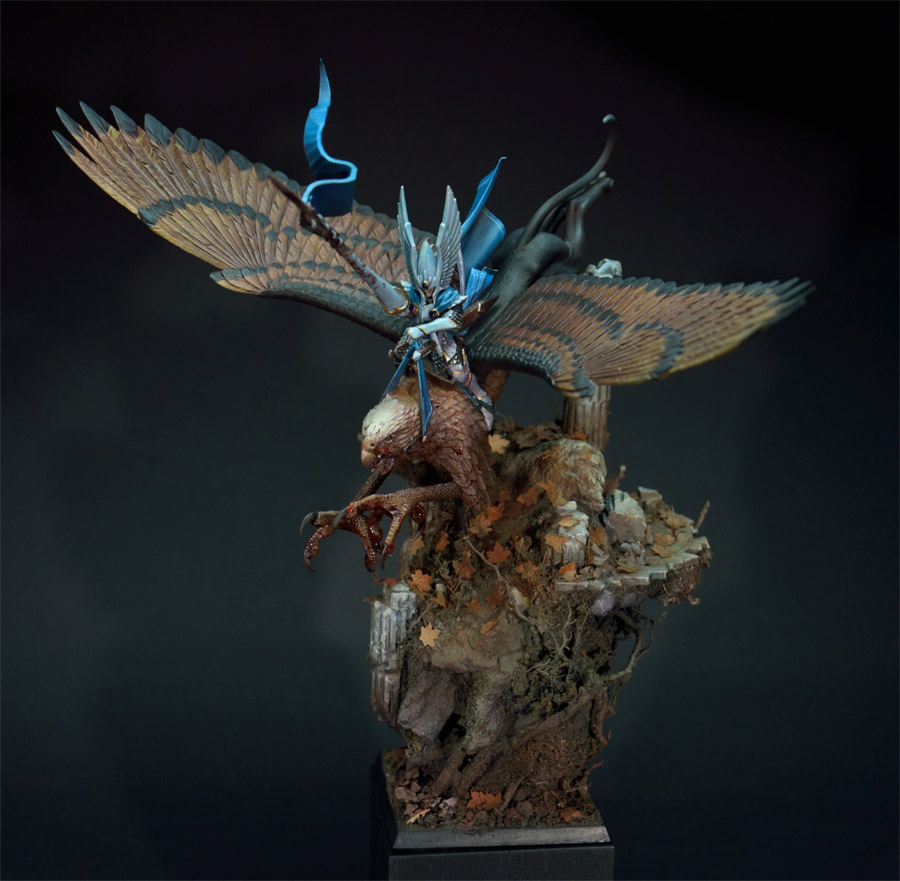
I was never happy with the cat booty and the highlights there. There are sculpted muscles but I did not paint them properly with enough definition. I was not sure about the freehand work I did on the cloaks, could go much more finer and structured there. There was a mould line on the upper flag and I had to scratch away the paint and redo it again. I was not sure about enough highlights and colours at the base. I was not happy with the contrasts of the eagles face and the detail sorrounding it. So it was time for pimping it up!
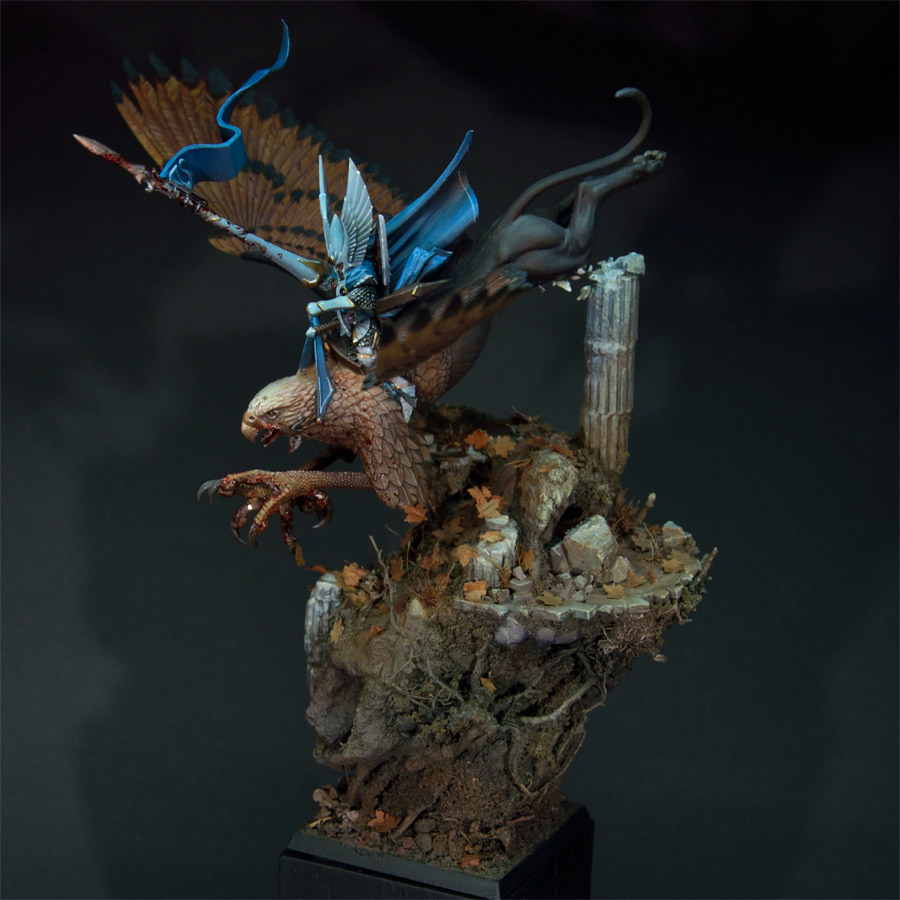
I told you I did cut away the evil mould line and redid the banner with a stronger blending from dark to bright. Also cleaned the weapon from several mould line rests and made it more bloody as I imagined how this guy is using this weapon with the force of a striking griffon. Splosh!!

I wanted to create even more movement to the already dynamic base and figure composition. Just the leaves wasn't enough for me when I went for the pimping. So I decided to let the griffon hit the column with his body and strike the stones of the column in his flight. I did so with the use of small plaster pieces and superglue - painted it later on.

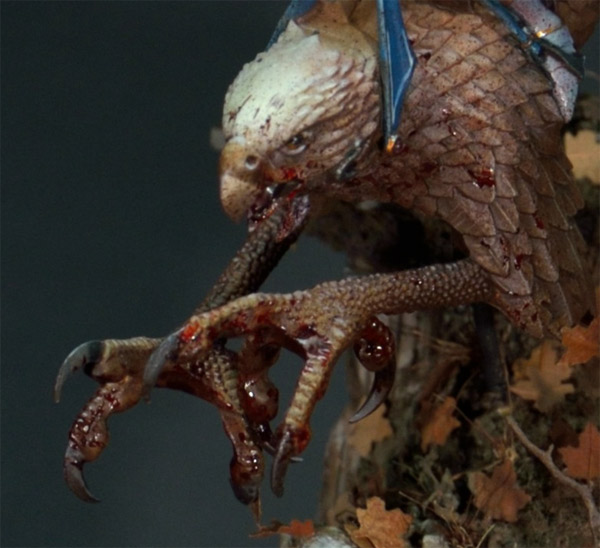
I was not happy with the detail on the eagles face so I redid the eyes, put more highlights on the upper head and at the claws.


I've concentrated working on the cat booty with bringing in some cold highlights, gentle ones to give the muscles more definition over there. Also I concentrated on some minor areas of the guys armour to clean it up with strong white and make it even more powerful. I added some stronger highlights to the base stone parts, also more definition. I used some gentle purple in the shadows of the base to bring more complementary contrast to the overall colour composition of the base and I took my time to clean up the freehand areas.
Before:
After:

As I told you the photos are some kind of crap when it comes to exact comparision as both are not truely what the figure looks like in real. Somewhere in the middle - you know how strange it sometimes can be when taking photos of figures, do you?
 I just wanted to share this article as pimping is very rare on my own figures and maybe you can find some purple here and there in the base, some stronger highlights here and something else that you can imagine it got pimped! In fact I just hope the article may help the one or the other ...
Questions? Please ask.
Happy Pimping to you!
Best Wishes
Roman
Hiho Jungle friends,
this time I am able to bring you another weird article and I allow myself to call it a step by step, BUT it is not in fact. It is the second "He got pimped!" article you now can find in the article section. I once pimped a gladiator bust and you can find the related article here.
_________________________________________________________
Pimping for me means...
... sometimes when I finish a model I am happy to finish it and am proud when it is done. I already sold the "Prince of autumn" but shipping the model the postal way is a no go at this figure and I am in good contact with the new owner. We planned to exchange the figure at this years german Games Day but both we failed but it ain't that bad :D
I promised the new owner to do some more things on the griffon as by time - as he comes to age - I see areas I wanted to do different. That is why sometimes I pimp stuff. Sometimes there is just something rolling in the deep.
Now to the point why this article might get confusing. The early photos are not the best from their quality and it is even hard for me to tell the difference, but I will try to explain and I hope my words are of any interest for some of you.
_________________________________________________________
I will now show you the figures early finish that I did back in 2011.

Now straight from my heart ...
I was never happy with the cat booty and the highlights there. There are sculpted muscles but I did not paint them properly with enough definition. I was not sure about the freehand work I did on the cloaks, could go much more finer and structured there. There was a mould line on the upper flag and I had to scratch away the paint and redo it again. I was not sure about enough highlights and colours at the base. I was not happy with the contrasts of the eagles face and the detail sorrounding it. So it was time for pimping it up!
I told you I did cut away the evil mould line and redid the banner with a stronger blending from dark to bright. Also cleaned the weapon from several mould line rests and made it more bloody as I imagined how this guy is using this weapon with the force of a striking griffon. Splosh!!

I wanted to create even more movement to the already dynamic base and figure composition. Just the leaves wasn't enough for me when I went for the pimping. So I decided to let the griffon hit the column with his body and strike the stones of the column in his flight. I did so with the use of small plaster pieces and superglue - painted it later on.
I was not happy with the detail on the eagles face so I redid the eyes, put more highlights on the upper head and at the claws.
I've concentrated working on the cat booty with bringing in some cold highlights, gentle ones to give the muscles more definition over there. Also I concentrated on some minor areas of the guys armour to clean it up with strong white and make it even more powerful. I added some stronger highlights to the base stone parts, also more definition. I used some gentle purple in the shadows of the base to bring more complementary contrast to the overall colour composition of the base and I took my time to clean up the freehand areas.
Before:
After:
As I told you the photos are some kind of crap when it comes to exact comparision as both are not truely what the figure looks like in real. Somewhere in the middle - you know how strange it sometimes can be when taking photos of figures, do you?
Questions? Please ask.
Happy Pimping to you!
Best Wishes
Roman


Did you change something on the wings? They look darker now -or is it only the picture? The darker cat-part looks better, but I would prefer the lighter wings, cause the colour fits better the autumn -theme.
Hiho, yeah looks different. It is the picture as I did not do anything on the wings. The real thing is in between both pictures ... :/
I didn't realise the eagle is not a high elf mini - where does the eagle come from? Also did you sculpt the cloak on the rider? As my friend is looking for a similar cloak for a high elf. Thanks.
@ Weisern: It is an highelvemini from warhammer fantasy. You get it with the starterbox just like you see it.
@ Roman: I like the idea with the rocks. never thought about something like this but i would have used it for a machine like an ork bommerjet. Its only my opinion and no attack on your work but i think this griffons knee schould be trash after cracking over a stonecolumn like this. ;)
@Anonymous
Thanks for the help - yes, Weisern, it is the a basic model without any sculpting stuff. Starter Box WHF.
Sure you can think about that knee, but he is a War Griffon who was trained his whole life to make his body hard as a rock ... with 2 years he was locked away into the high elf prisons filled with dwarfs and his knees learned to be stubborn there :)
Sure you are right!
Great, thanks. That's why I couldn't find it on the GW site. I didn't look at the army box sets.