


Good Morning Jungle Painters,
Monday again. A new week ahead.
Not everybody in the world likes Mondays. It is the day after the relaxation of the weekend and work is ahead again. Well, we all have done this so many times and still do not like Mondays. Well, maybe we have just the right thing for you to feel good. A fresh article out of the massive jungle. Tutorial time once again.
Roman is sitting down to explain his thoughts and steps while preparing a bust for painting. This tutorial is about "pinning a bust to a plinth" and tells you tricks and tips while you do so.
We hope you enjoy, if so - feel invited to drop a comment!
_______________________________________________________________________________
FOREWORD
Well, pinning is an important topic in our small miniature world. Sometimes if you are too lazy to pin something properly you might regret it once in a while and even if we all made that mistake before we do it over and over again.
Massive Voodoo's article section already has some articles about pinning, check them out here:
Article showing you how you can fix a big and heavy model to a gaming base.
Pin your gaming figures the easy way
This article shows you how to fix your models without drilling or a metal pin.
Well, not everybody is as familar with pinning a bust. We do it regularly in the MV-HQ, but never thought it is worth an article until now.
Recently I bought my first plinth from famous plinth-maker Dino Pivato from Italy. They are not cheap, but candy for the eye. I did buy it from Dino at this years Duke of Bavaria show and I would place a link for you all here if I would find Dino's homepage. I am not sure if he owns one.

As I decided to pin a bust to Dino's plinth I wanted to pin this beauty of a plinth kind of perfect. Everyone who knows me can be sure I am often far away from perfection, but still I was up for the competition.
PINNING PROCESS
Ok, now full steam ... eh, drill ahead.
What you need for high quality drill work are several different drill heads. You can work with a hand drill, a small drill machine, a bigger drill machine or even a standing drill machine. Whatever you use, you need drill heads. I got several ones. You can get them cheap via different distributors, like Battlefield-Berlin, PK-Pro or even on Amazon.

Keep your drills organised. Not like I do. Try to place everyone back from the spot you took it before. Most of the drill containers have small numbers to the drills that show you their size in an instand. Keep them organised or search and seek.

Secure yourself while drilling:
While drilling resin, plastic or wood we recommend wearing protective glasses and a simple breathing mask. It is not healthy to breathe the dust we produce. Protective glasses can be bought cheap on Amazon.
The next warning does not affects me, but if you have long hair on top of your head, a long beard or long eyebrow-hair make sure they are not near the drill or you might hurt yourself badly. Put your hair and everything loose of your clothing away while drilling.

The sequence of pinning is simple:
#01 Drill a hole

#02 Make sure your pin fits the hole and place it. Should be done with glue to keep it stronger. I use super glue for ... yeah, everything.

Now to something important: Do not just drill like a maniac. Prepare your drill hole. Why?
Well, if you use an automatic drill and just hit the wood or resin, or you might find "accidents" happen. Your drill dances on the wood and it is hard to focus it on the spot you actually want to drill. You can see that in the upper area of my wood piece, on the following photo. I am sure some of you know what I am talking 'bout.
It is important that you place tiny holes before you start drilling. This can be done with a blade of any sort, a nail or your teeth. No not really with your teeth.

Drills are shaped like this: They have a tip if they are not broken or unusable.

The drills ^-shaped like tip connects with your prepared tiny hole and the drill will get grip. You are now able to drill now very accourate without a dancing drill. So prepare your drill holes.

Now to the pins. We have a good collection of aluminium and steel pins at the studio. If you checked your drill size and already decided for a size of the pin it should be an easy thing to find a friends. If you want to save on time or frustration I recommend checking this before you start drilling.

Ok, after preparations, tests and gaining some bravery from it I head over to Dino's magic plinth. I start to make my tiny hole where I want it to be.

I drilled and was happy with the result. The pin fits perfectly and I did not damage the plinth.

Now I decided to head over to the bust. Make sure to know where you want to place it or you will forehead-slap yourself afterwards. For testing it just place the bust on top of the pin that is already in the plinth and check back how you like it the most. First step again: Tiny hole. Drilling.

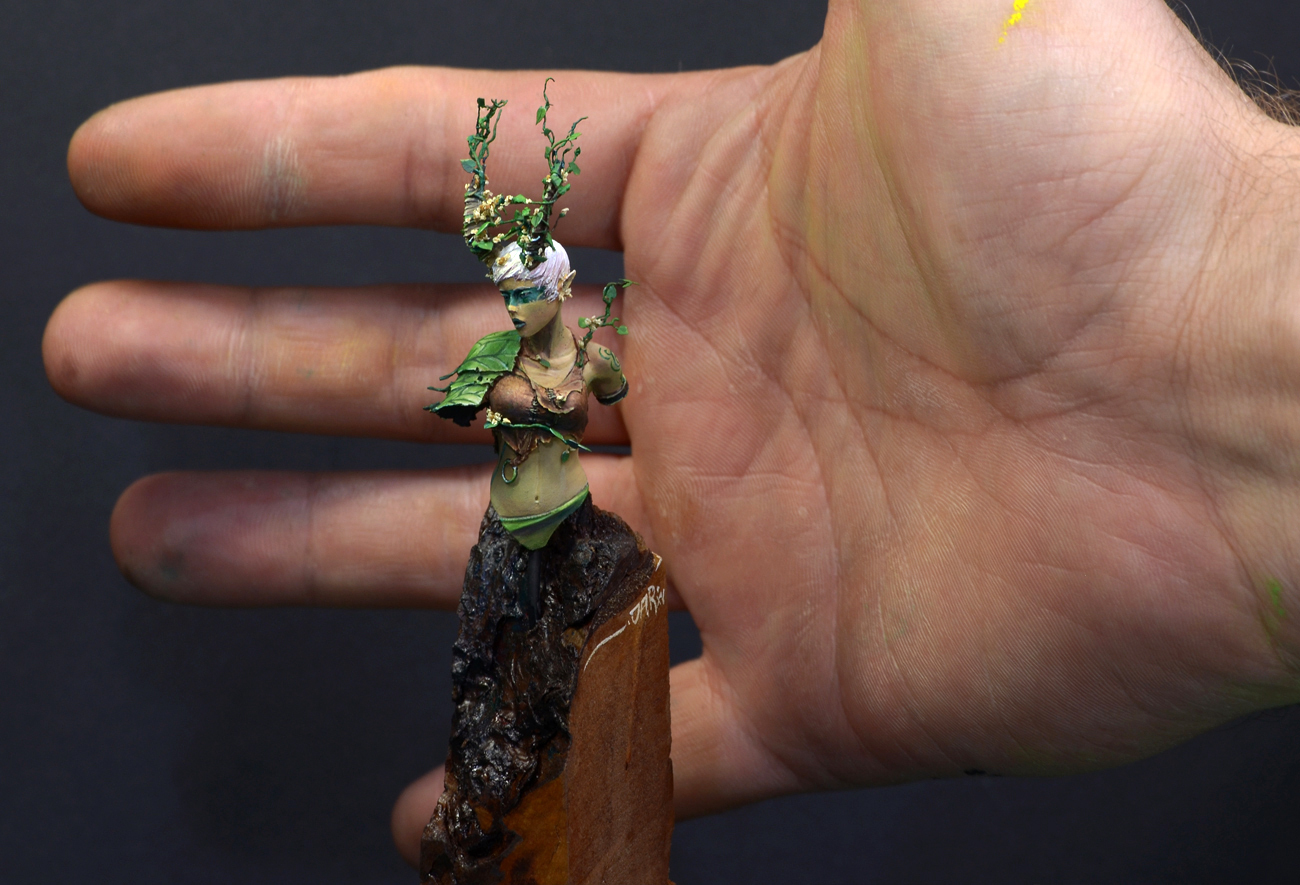
Happy with the result still, even the photo is shaky. At the MV-studio we often use aluminum pins as you can still gently move and bend them as you see fit. Usually I often use bust plinths from Sockelmacher.de for placing my busts, but this time I decided to go for this flat one.


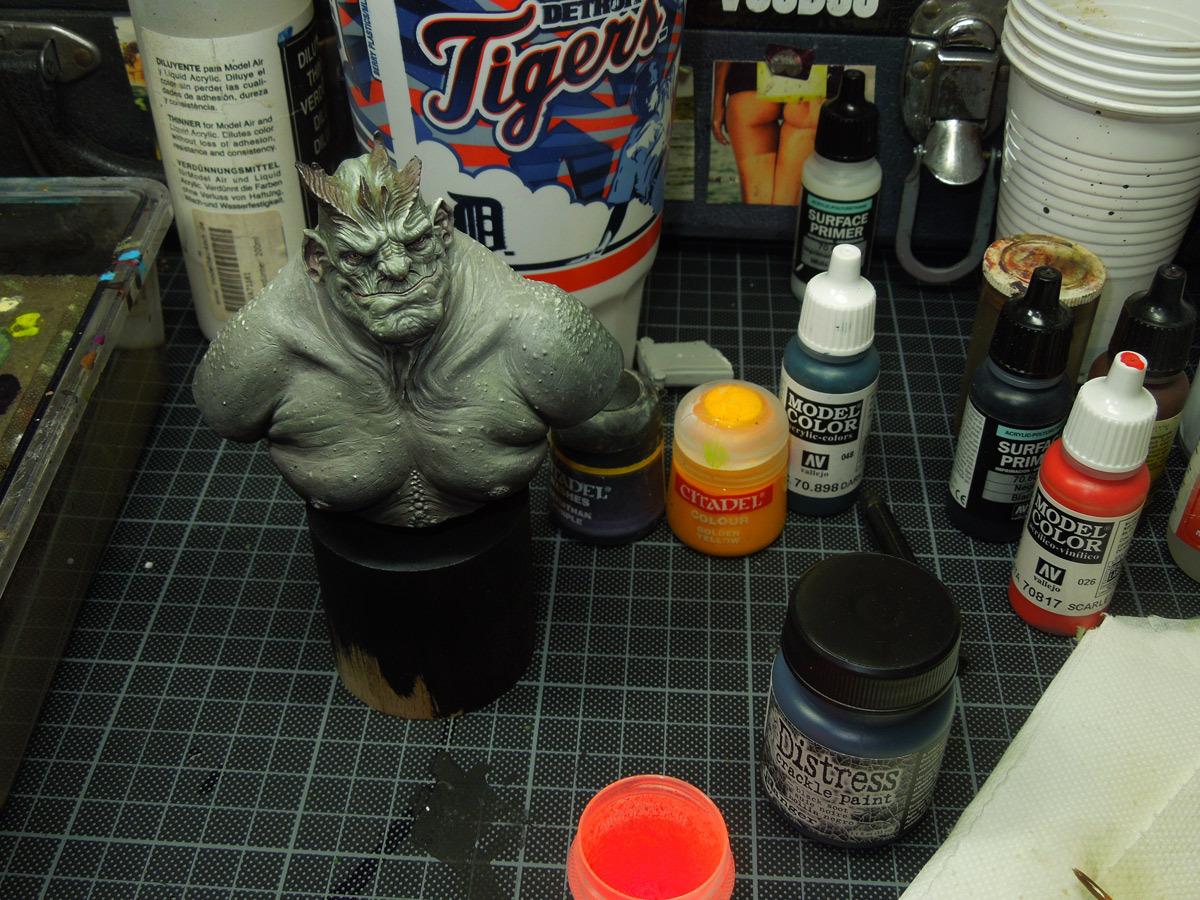
I glued the bust to the pin but not did so with the pin and plinth. I am painted that bust on a "work plinth" which went pretty dirty in the process. Just after finishing the paintjob I connected everything.
The pin was carefully glued to the plinth with a tiny amount of superglue and the backside of the bust and the plinth have been painted straight black to avoid attention of glittering silver.
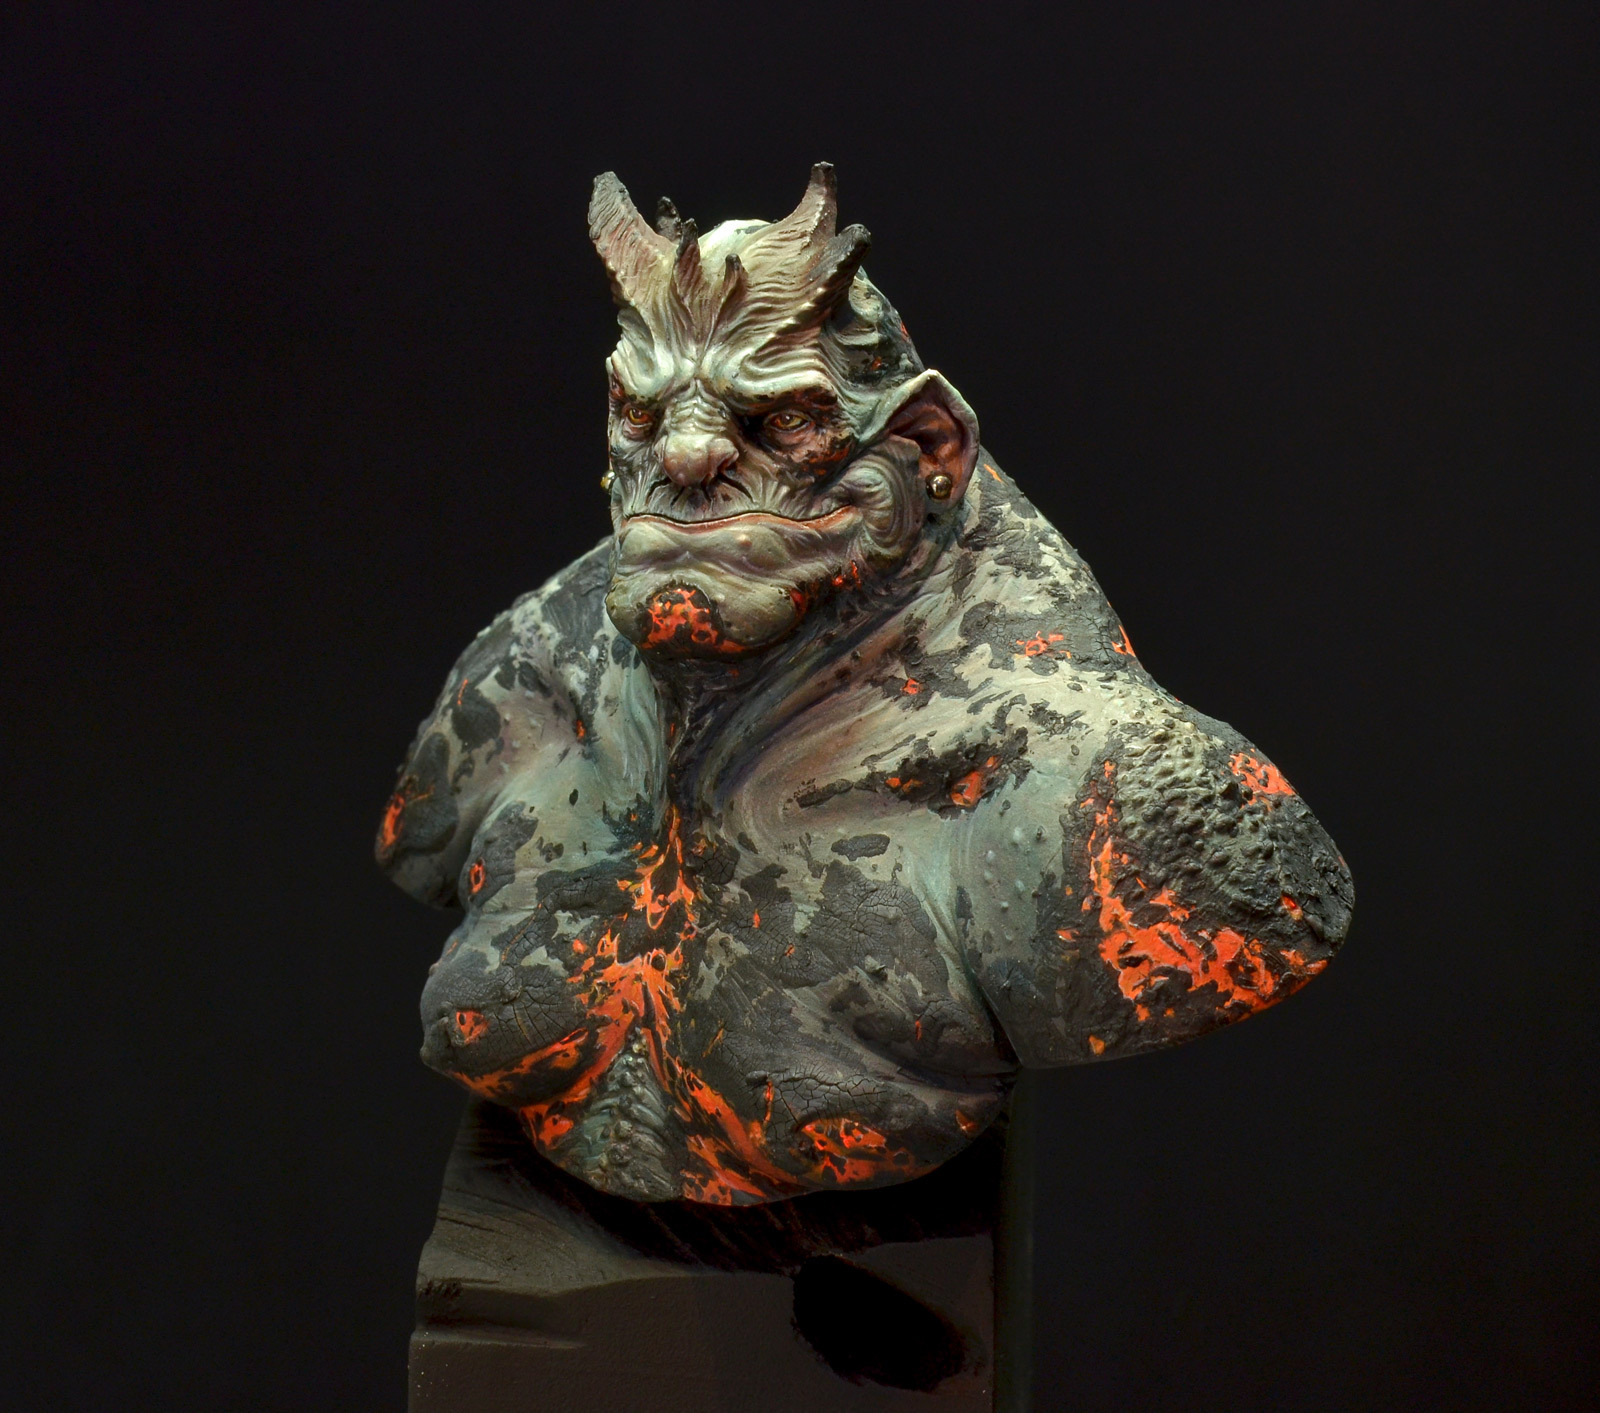
Some other examples of busts on different plinths, final versions, working plinths:


Hope you enjoyed the article!
Keep on happy drilling and painting!
Best Wishes
Roman
Monday again. A new week ahead.
Not everybody in the world likes Mondays. It is the day after the relaxation of the weekend and work is ahead again. Well, we all have done this so many times and still do not like Mondays. Well, maybe we have just the right thing for you to feel good. A fresh article out of the massive jungle. Tutorial time once again.
Roman is sitting down to explain his thoughts and steps while preparing a bust for painting. This tutorial is about "pinning a bust to a plinth" and tells you tricks and tips while you do so.
We hope you enjoy, if so - feel invited to drop a comment!
_______________________________________________________________________________
FOREWORD
Well, pinning is an important topic in our small miniature world. Sometimes if you are too lazy to pin something properly you might regret it once in a while and even if we all made that mistake before we do it over and over again.
Massive Voodoo's article section already has some articles about pinning, check them out here:
Article showing you how you can fix a big and heavy model to a gaming base.


Pin your gaming figures the easy way
This article shows you how to fix your models without drilling or a metal pin.
Well, not everybody is as familar with pinning a bust. We do it regularly in the MV-HQ, but never thought it is worth an article until now.
Recently I bought my first plinth from famous plinth-maker Dino Pivato from Italy. They are not cheap, but candy for the eye. I did buy it from Dino at this years Duke of Bavaria show and I would place a link for you all here if I would find Dino's homepage. I am not sure if he owns one.
Roman & Dino at the Duke of Bavaria 2014

As I decided to pin a bust to Dino's plinth I wanted to pin this beauty of a plinth kind of perfect. Everyone who knows me can be sure I am often far away from perfection, but still I was up for the competition.
PINNING PROCESS
Ok, now full steam ... eh, drill ahead.
What you need for high quality drill work are several different drill heads. You can work with a hand drill, a small drill machine, a bigger drill machine or even a standing drill machine. Whatever you use, you need drill heads. I got several ones. You can get them cheap via different distributors, like Battlefield-Berlin, PK-Pro or even on Amazon.
These are not hammer and nails!

Keep your drills organised. Not like I do. Try to place everyone back from the spot you took it before. Most of the drill containers have small numbers to the drills that show you their size in an instand. Keep them organised or search and seek.

Secure yourself while drilling:
While drilling resin, plastic or wood we recommend wearing protective glasses and a simple breathing mask. It is not healthy to breathe the dust we produce. Protective glasses can be bought cheap on Amazon.
The next warning does not affects me, but if you have long hair on top of your head, a long beard or long eyebrow-hair make sure they are not near the drill or you might hurt yourself badly. Put your hair and everything loose of your clothing away while drilling.
Wear protective glasses to avoid pain in the eye!
Look serious and focused even if you are scared to destroy Dino's plinth!
Look serious and focused even if you are scared to destroy Dino's plinth!

The sequence of pinning is simple:
#01 Drill a hole

#02 Make sure your pin fits the hole and place it. Should be done with glue to keep it stronger. I use super glue for ... yeah, everything.

Now to something important: Do not just drill like a maniac. Prepare your drill hole. Why?
Well, if you use an automatic drill and just hit the wood or resin, or you might find "accidents" happen. Your drill dances on the wood and it is hard to focus it on the spot you actually want to drill. You can see that in the upper area of my wood piece, on the following photo. I am sure some of you know what I am talking 'bout.
It is important that you place tiny holes before you start drilling. This can be done with a blade of any sort, a nail or your teeth. No not really with your teeth.

Drills are shaped like this: They have a tip if they are not broken or unusable.

The drills ^-shaped like tip connects with your prepared tiny hole and the drill will get grip. You are now able to drill now very accourate without a dancing drill. So prepare your drill holes.

Now to the pins. We have a good collection of aluminium and steel pins at the studio. If you checked your drill size and already decided for a size of the pin it should be an easy thing to find a friends. If you want to save on time or frustration I recommend checking this before you start drilling.

Ok, after preparations, tests and gaining some bravery from it I head over to Dino's magic plinth. I start to make my tiny hole where I want it to be.

I drilled and was happy with the result. The pin fits perfectly and I did not damage the plinth.

Now I decided to head over to the bust. Make sure to know where you want to place it or you will forehead-slap yourself afterwards. For testing it just place the bust on top of the pin that is already in the plinth and check back how you like it the most. First step again: Tiny hole. Drilling.

Happy with the result still, even the photo is shaky. At the MV-studio we often use aluminum pins as you can still gently move and bend them as you see fit. Usually I often use bust plinths from Sockelmacher.de for placing my busts, but this time I decided to go for this flat one.


I glued the bust to the pin but not did so with the pin and plinth. I am painted that bust on a "work plinth" which went pretty dirty in the process. Just after finishing the paintjob I connected everything.
The pin was carefully glued to the plinth with a tiny amount of superglue and the backside of the bust and the plinth have been painted straight black to avoid attention of glittering silver.
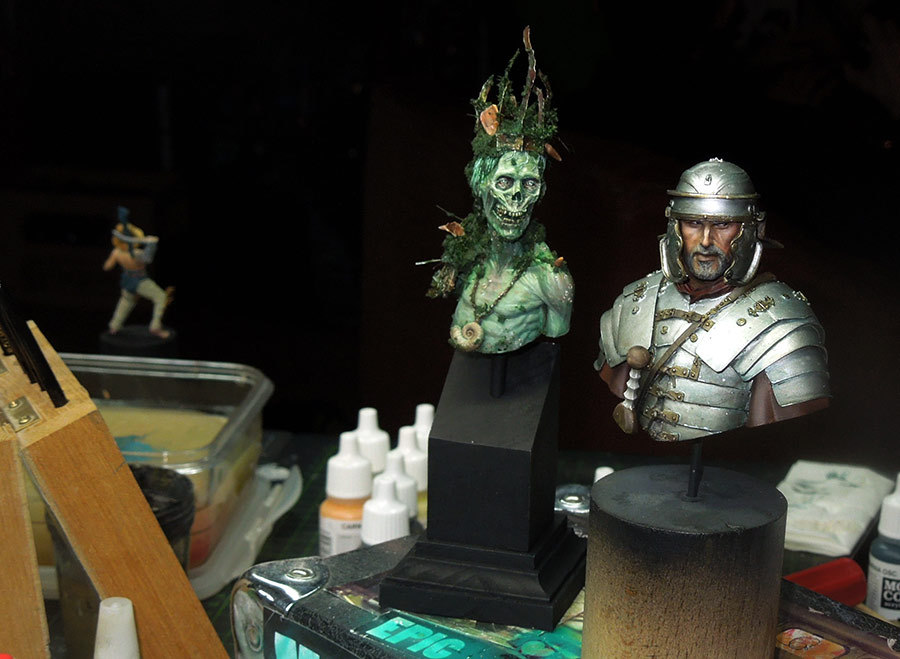
Some other examples of busts on different plinths, final versions, working plinths:
Keep on happy drilling and painting!
Best Wishes
Roman


Great plinth.. great bust to go with it.. but where do you get the aluminum pins from in different sizes?
They look like Welding Equipment - look for TIG-Rods
There are different shape drill heads for woods,more easy to drill.
The last picture where the zombie guy and the armor guy are sharing a glance in the same direction, as the zombie seems to be telling a joke, is great. Lol
Roman writing: Lol ... never saw that one coming. Pretty cool!
Dino Pivato Is on facebook
He says his bases are expensive, I do not agree. Other manufacturers have higher prices and not the same quality
@Giorgio
True. Not really expensive for the high quality you get. They are amazing. More expensive for people who just start with the hobby and only use pieces of simple wood so far. That is what I meant. Sorry.
This is very interesting and, more important, useful. I have a question about going the other way. What if I would like to change a plinth for my figurines? Say I finally found the perfect color of wood and the shape that looks perfect for my figurine? The fact that superglue has been used makes things very dangerous for the health of a figurine. Thank you for your advice.
You can always change a plinth MrT ... even with superglue and a fragile figure involved. Just do it carefully and if somethings breaks, glue it again :)