


Time for another look on some new hobby material via MV's Miniature Unpacked, but this time it is a mixture of unpacking, testing and some kind of tutorial.
You might know that MV is well known to have a look on very interesting products outthere. Combined with our everyday painting of an average of eight hours since several years, we can also provide a good look on new material with practical experience.
This said, I want to introduce a company to you I really enjoy lately.
Their products are mainly aimed for the hobby of Scale Models, at least this is what their page communicates, but I am sure this will change a lot in the future as their products are also great for our hobby of miniature painting. Let me introduce to you:
I did get in contact with one of their products when Battlefield-Berlin sent me one bottle of "Normal Rust" and I got convinced by the result I recieved by using it. Modelmates has no shop on its own and is selling via different dealers in different countries. You can find a list of their retailers here!
Meanwhile I am happy to announce that Modelmates is now official sponsor of MV Painting Classes and participants on our classes can find out why we like their products that much on their own, testing and experiencing them during the classes.
In this review I will take a look on their Rust Effect Liquid.
There will be more later on as their list of products is much bigger and MV is in the middle of experiments with them and is recieving very, very cool results.
"Please know that this is just my own experience with these products. I tell you honestly what I do like and don't. I can not assure you that you will make the same experience as you might have a different taste or different requirements than I have."
Roman
______________________________________________________________________________
Rust Effect Liquid
Every Miniature Painter gets confronted with painting rust some day. If you are painting historical figures, fantasy- or science-fiction-figures or vehicles. It does not really matter one day or the other you want to place some rust somewhere. Material weathers, changes by the influance of its sorrounding world.
Massive Voodoo has a lot of articles about "Weathering".
You can find even more if you take a closer look into the jungle's article section.
Painting rust takes time if you want to recieve a proper result. You can just do it with some normal acrylic colours, using different colours that catch the tone of rust and combine them. You can add pigments to it to make it look more dry and dusty. There are some really cool special colours outthere, but I was not yet convinced by any as I was with this product. I made a first test with my first bottle of ModelMates Rust Normal Effect some months ago on a piece of plastic and this is what I got:

I wanted to give this a deeper test as the result was just too good by just taking it out of the bottle.
Now lets have this deeper look. All three of ModelMates rust liquids in the jungle test.
From left to right, this is what the page of Modelmates says:
Rust Yellow Effect (left):
Lighter, younger yellow rust colour, ideal for final highlight coats.
Rust Normal Effect (middle):
Original rust effect. A fantastic realistic rust effect for most situations.
Rust Copper Effect (right):
Darker, older brown/red copper rust colour, ideal for older rust colours.

I had my first experiences with the "Normal Effect", but in this review I want to take a closer look on all of them. I was really positivly surprised to see the describtion text at the bottles in german, as I knew Modelmates is based in the UK. So this is already a plus, for me as a german speaker and all the german speakers on my painting classes. I also have some bottles with english text on it - don't you worry - so international the use of this rust effect is also explained well.
Testing
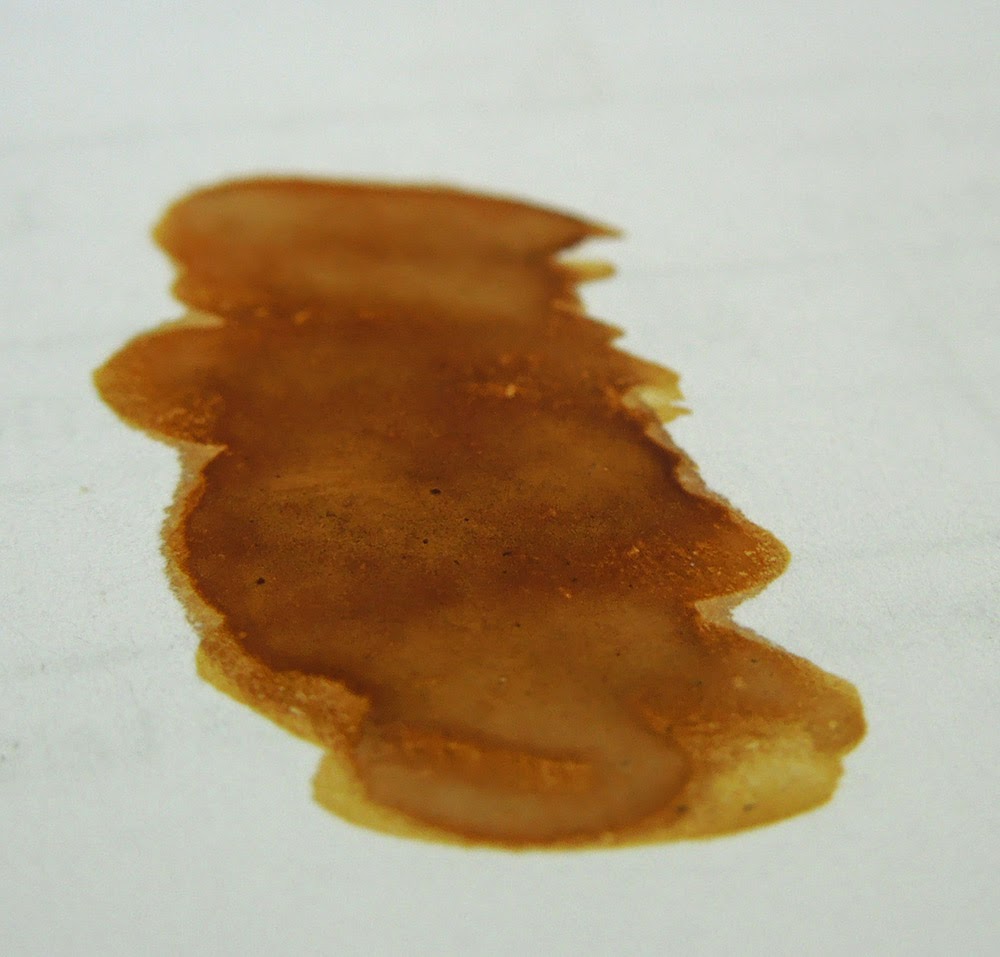
Ok, now I want to show you what I think makes this a fantastic product for us miniature painters. I am opening up the bottles and just place its content on a white sheet of paper. Having some fun with it.
Very important is to use an older brush for it, do not take your new Windsor&Newton for it. Shake the bottles well. They have a metal ball inside to really get everything inside mixed up properly. Shake until you hear the ball and then shake some more. Shake it like a saltshaker!

Well, this is how it looks if taken out of the bottle. I applied it thicker or thinned with water to see how it looks. Testing. What I really enjoy is the rough surface that appears, it already looks like rust if you have a closer look. Now it was time to do experiments, placing several layers on top of the first ones ... good thing is, you can thin it water at the start of your work or even use water after the applyment to remove or change it a little bit.
Yellow Effect first applyment:
Yellow Effect second applyment, thicker layers on top

Normal Effect, first applyment

Normal Effect, second run

Copper Effect, first run, thinned in the front, thicker in the back

Going a little mad on the Copper Effect, testing several layers, thinned and less thinned ...

Going mad for testing with the Normal Effect here, same procedure, wild style:

Doing the same to the Light Effect, well with my madness and the thickness I used it is not that light anymore :D

So, this is just the initial test and hell yeah it was fun, you can believe that. What I was learning in between is that you should not leave your bottles open as the upper border, touched by air starts to dry. Take care of that, don't forget to close your colours when you are done with using them.

If you forget ... it looks like this, try to avoid that ... seriously!

Now I want to combine all three of them in a wild test. Let's see how this turned out, again wild style:

It also says on the bottles that these effects are water soluble. That is a nice thing to know. It means if you apply it to a surface you are still able to work with it. You can pull it, damp it, even remove most of it when using time and water. Makes your tests less dangerous. If it is dry you can not easily rub it off with your fingers. Cool thing is, as soon as another layer of colour gets on top of it, for example a glaze or a wash, it is fixed.
What I really enjoy about the Modelmates products are their own guides on their page. Really check those to see in how many different ways you can apply the rust effect.
Examples
Ok, I am still convinced, but what about a more useful test.
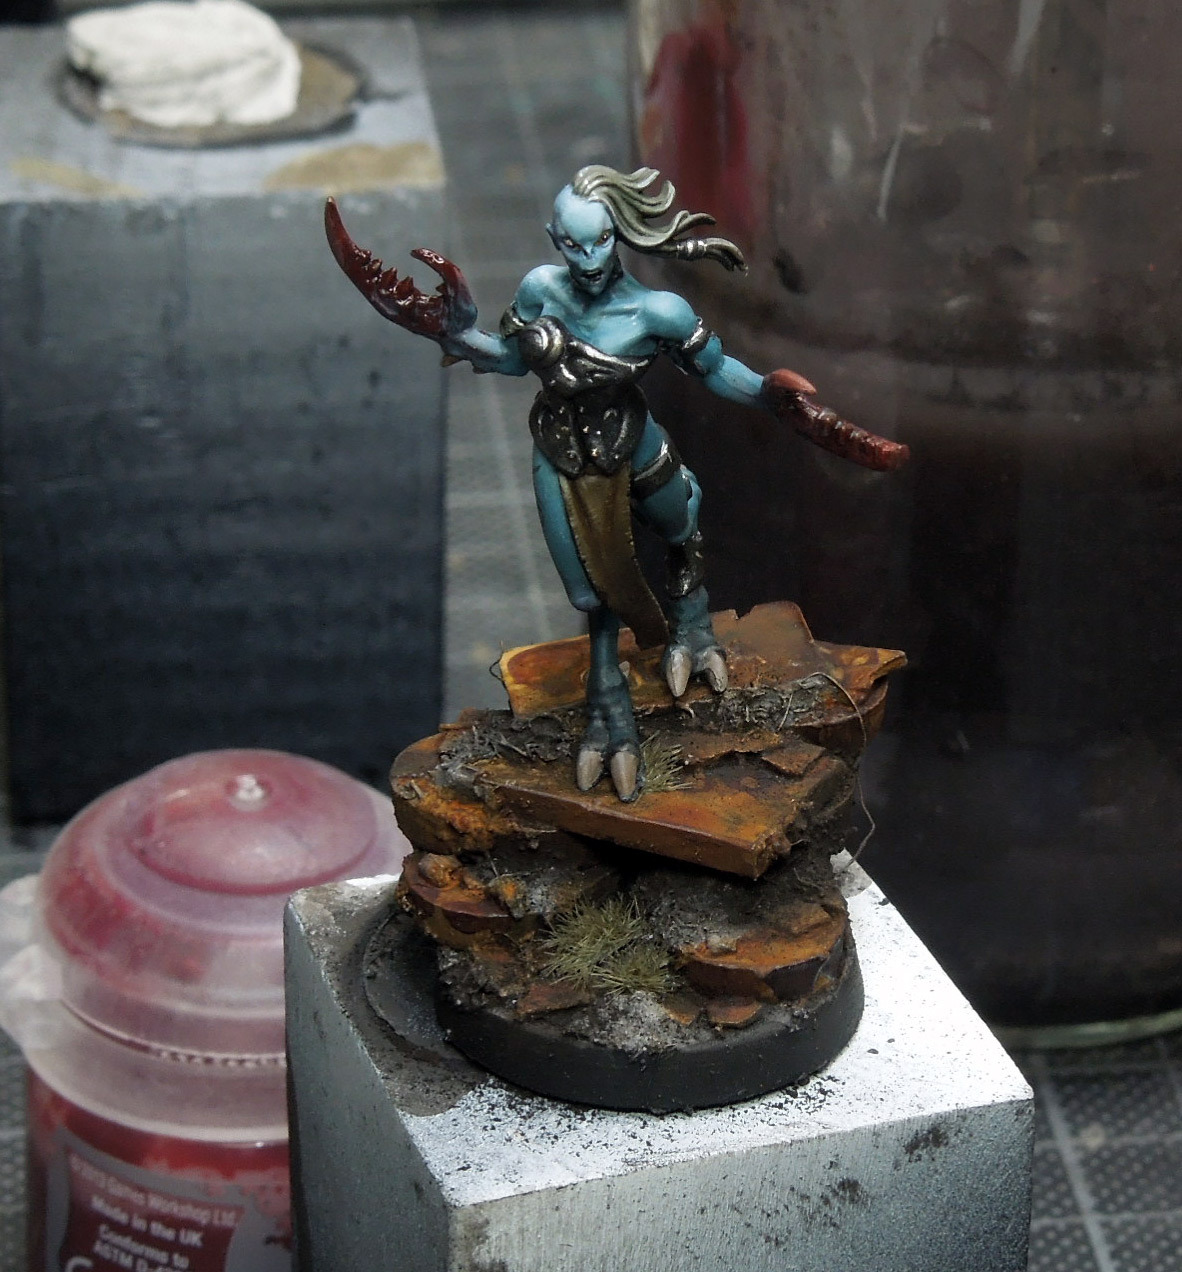
Instead of white paper I show you now how it looks applied to some figures:
Used on one of my quick gaming bases ...

Hannes's basework during the same class ...
he did a combination with the rust effects
and pigments and shows that you still can work on the
surfaces with edge highlights.

Raffa used it on the metal buckle
of his latest supercool Lichy Priest sculpt:
of his latest supercool Lichy Priest sculpt:

Peter used the Normal Effect very gently punctually on his "Dead King's" armour and weaponry.

I used the Normal Effect during my work on "the First One",
the cool robot kit from Heroes&Villians to gain some experience with it.
Work in Progress, a step by step of the project is in preparation:

Final result ...

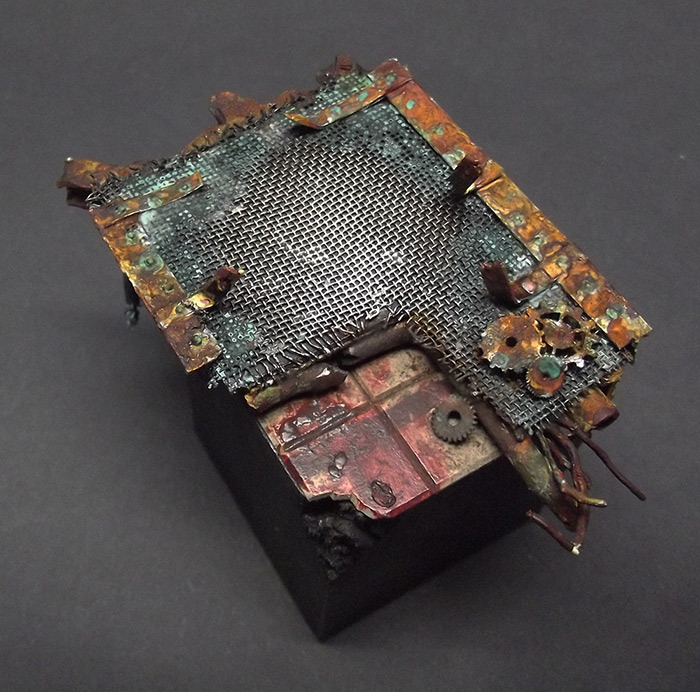
Here is another example from Sebastian, a base that he did recently on the last painting class in Forchheim, which was held last weekend. He used all three rust effects on it and the Verdigris effect:
Some months ago I already had one big, mad test running.
This was the time when I first encountered ModelMates's rust. I took a cool tank from Heer 46 and created a little tank wreck. I applied an acrylic-colour-airbrush-basecoat to it, threw tons of the rust effect on it, used thicker and thinner layers. I used water here and there to achive a less opaque surface and test different textures. Sprayed acrylic colours in between again and did it all over again ... this sounds mad and it was, but I had so much fun. It is not finished yet but I really got a feeling for working with the rust effect (this was only normal effect):

Another test went on top of a real rusted rasp I found - just placed the normal effect there:


There will be more examples for sure in the future :)
Closing words
This all sounds like a big praise and well it is, but I want to give you my personal thoughts on it too. I really enjoy the rust product of ModelMates as it offers a lot of variety in the way you use it. What I also love is that it saves time. I think there is still a lot to test by using it for more projects, see it combined with already known techniques. I think this is just the tip of the iceberg on how you can use that product.
Well, that is so far all I can say about that rust and I guess that wall of text is enough already for many of you. If you made it this far, I say thank you and give you a little preview on the "Verdigris products" we are testing in the same manner soon on one of Forged Monkey's upcoming releases:

So far keep on happy weathering!
Best Wishes
Best Wishes
Roman


Model Mates are much too expensive. You get cheaper and better effects from other companies!
Did some first experiments with the "Normalton" (as I only have this one so far). Works great and saves a lot of time.
Additionally, if you mix some pigments in the rust-liquid, it broadens the spectrum of colors, textures, etc. so much more. Fun all the way :-D
Best regards
It looks good but as Anonymous said there are cheaper products... It could be much more better to make some kind of matching with these products. What I liked are 'the maps' - it really looks fine.
Always talking about cheaper products without naming them... which ones?
Do you mean it? :-) We are guests here and the tutorial was about something that works. And it does.
Was able to play around with some bottles of this over the weekend and I agree it is pretty cool stuff. I am not sure what other products others are talking about but this article was to explain this product, not a comparison to others. And in the end, this rust in a bottle does what it says on said bottle.. provides rust :) Nice work, and great product!
Thanks for your feedback, guys. Well, I did not have my hands on other products yet that convinced me that much as the ones from Modelmates did. I am happy to read your thoughts and oppinions on this topic here. Like you said, this article is not about comparision, this article is about showing you why MV likes these rust effects with examples and a guide how to use them ...
I've brought all three tones, tested them and declared them as very useful. Seriously, they do what they should do very well and if they cost one euro/pound more or less than other products... The bottles will last for quite a while, so I couldn't care less!
What I still have to figure out is, how to apply some after-work to the rust effect. Until now, they reacted quite sensitive to other liquid products, they brighten up significantly. I'll report as soon as I finished some tests.
I wrote a comment earlier, though it seems to have vanished into the ether. Apologies if they both arrive at once.
A question for those who have used this intriguing looking stuff: does it change colour when you varnish it? I would be using it on models that would be handled, so it needs to be protected. However, it's more than a bit frustrating if you get something just the way you like it, then it changes colour at the end when all you're doing is trying to preserve it in that state. I used to do 2D pastel pictures, and that was always terrible for changing colour when you fixed it.
Does anyone have experience with varnishing this stuff?
@Graf
Looking forward to read your progress. I for my part can say, I like to throw a gentle wash over the effect and this makes it sturdy and not so sensitive anymore, than I work on with different colours or the rust effect again.
@Quirkworthy
If you do a gentle wash on top - I am using Army Painter washes - they'll be already fixed. I did not yet varnish them, so no experience there. There is also teh option to use pigment fixer, from AMMO or Secret Weapon ...
Thanks MV. Sounds like I need to order some and have a play ;)
Are there any alternatives to Modelmates? I can't seem to find any online (as they've gone out of business. I'm also in the states.
Are there any alternatives to Modelmates? I can't seem to find any online (as they've gone out of business. I'm also in the states.
Yes, we've realized the bad news too. Modelmates is out of business. Sadly we do not know alternatives that have the same effects.
Has been renames as Dirty Down:
https://dirtydown.co.uk/product/water-soluble-paint-rust-25ml-pot/